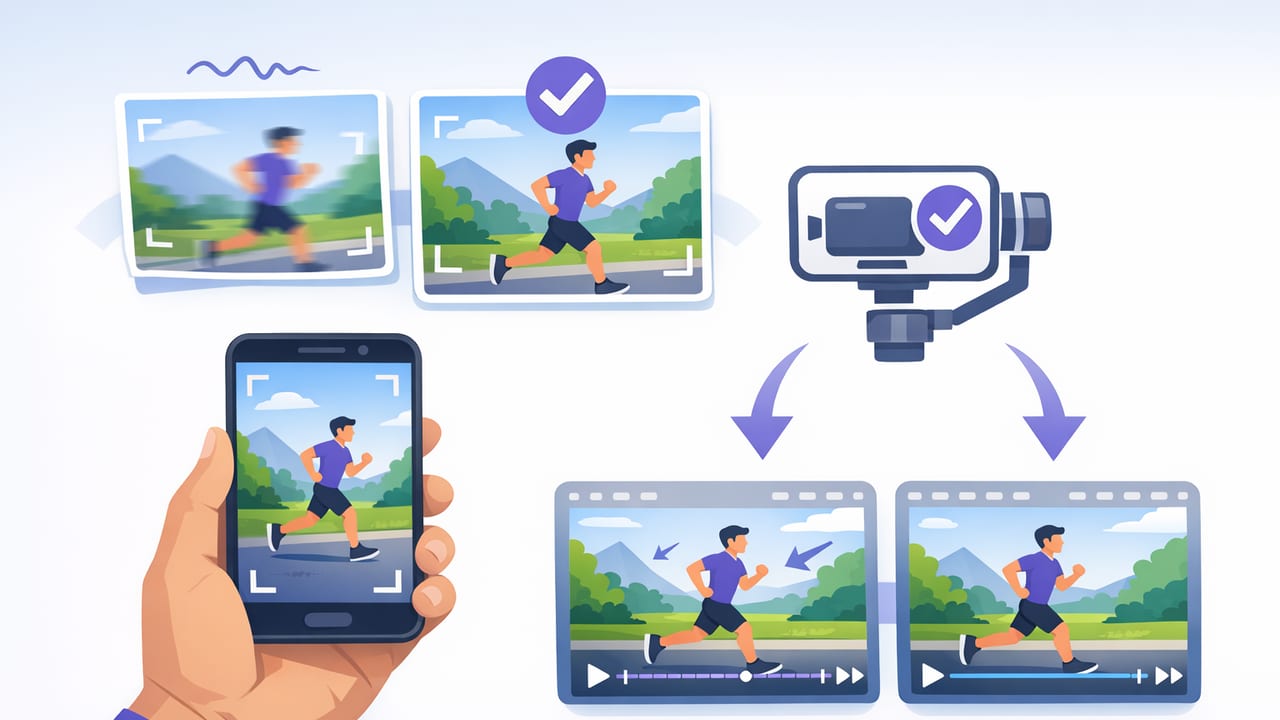
Smooth footage is one of the fastest ways to make scripted content feel “pro.” Even when your lighting and audio are solid, shaky camera movement can distract viewers, reduce watch time, and make subtitles harder to follow. The good news: stabilized video recording on iPhone is achievable with a few smart choices—some are free settings, others are simple setup tweaks, and only a few require extra gear.
This guide breaks down iPhone stabilization options, when to use each, and a repeatable workflow for creators who record talking-head videos, tutorials, demos, and voiceover-with-b-roll.
What “stabilized video recording” really means
Stabilization aims to reduce visible shake caused by small hand movements or footsteps. On iPhone, stability can come from:
- Optical stabilization (OIS): physical lens/sensor movement to counter shake (common on many iPhone cameras).
- Electronic stabilization (EIS): software smoothing that crops and repositions frames.
- Mode-based stabilization: special recording modes that increase stabilization by cropping more and using motion data.
- Mechanical stabilization: tripods, grips, gimbals, and body technique.
Most creator setups use a blend: a stable mount for your “A-roll” (the main scripted segment) and a stabilized handheld approach for b-roll.
Quick decision: which stabilization approach should you use?
| Method | Best for | Pros | Tradeoffs |
|---|---|---|---|
| Tripod + static shot | Talking head, tutorials, teleprompter reads | Most stable, consistent framing, easy editing | Less dynamic; requires composition planning |
| Handheld with good technique | Quick b-roll, behind-the-scenes | Fast, minimal gear | Footstep bounce and micro-jitters can remain |
| Enhanced stabilization / action-style mode | Walking shots, vlogs, energetic b-roll | Smoother movement without a gimbal | More crop; may reduce low-light quality |
| Gimbal | Product walkthroughs, moving tutorials, cinematic b-roll | Very smooth motion and turns | Setup time, balancing, battery, learning curve |
| Post stabilization (editing) | Fixing minor shake after recording | Salvages usable takes | Can crop/warp; won’t fully fix heavy shake |
iPhone settings that affect stabilization (and quality)
1) Resolution and frame rate: choose stability-friendly defaults
For most creators, a reliable baseline is:
- 4K at 30fps for talking head and controlled scenes
- 4K at 60fps for movement, demos, or b-roll where motion looks better smoother
Higher frame rates can make micro-jitters less noticeable, and they give you more flexibility for slowing down b-roll. The tradeoff is larger files and sometimes lower low-light performance depending on your scene.
2) Shutter speed: reduce motion blur, but don’t fight your lighting
If your camera app allows manual control, try to keep motion blur consistent. A common starting point is the “180-degree shutter rule”:
- 30fps → around 1/60
- 60fps → around 1/120
Too much motion blur can make stabilization artifacts more noticeable; too little can look choppy if your lighting forces high shutter speeds. If you can, add light rather than pushing extreme settings.
3) Lens choice matters more than most people think
Wide lenses tend to look steadier than telephoto because they magnify shake less. If you’re seeing jitter:
- Try the main wide camera instead of zooming in.
- Physically move the tripod closer rather than using heavy digital zoom.
4) Lock focus and exposure for consistent stabilization
When focus/exposure hunts, the image “pumps” and can feel shakier even if the camera is stable. For scripted A-roll, lock your focus and exposure once you’re framed. Consistency also makes jump cuts easier to hide.
Best practices for stable A-roll (scripted talking-head)
For most creators, the cleanest results come from a static setup. Here’s a simple recipe:
Use a tripod (or at least a solid stand)
- Place the iPhone at eye level to avoid awkward angles.
- Use a mount that doesn’t flex when you tap the screen.
- If you’re on a desk stand, add weight (a book or small sandbag) to reduce wobble.
Compose for minor crops
Even if you plan a static shot, leave a little headroom and side space in case you later apply post stabilization or reframe to vertical. Many editors stabilize by cropping slightly—planning for it prevents “accidental forehead cuts.”
Stabilize your environment, not just the camera
- Don’t film on a bouncy floor if you’re standing and gesturing aggressively.
- Avoid bumping the desk/tripod with your hands.
- Route microphone cables so they don’t tug the phone mount.
Best practices for stable handheld b-roll (without buying a gimbal)
If you want stabilized video recording while moving—especially for product shots, over-the-shoulder demos, or quick scene transitions—technique matters.
Use “three points of contact”
- Hold the phone with two hands.
- Keep elbows lightly tucked into your torso.
- Bring the phone slightly closer to your body (your body becomes a shock absorber).
Walk like you’re carrying a full cup of coffee
Footstep bounce is the #1 giveaway of handheld footage. Try:
- Shorter steps
- Softer heel-to-toe roll
- Keeping your hips level
Prefer slow moves over fast pans
Fast pans can create warping with EIS. If you need to reveal something, move slower and pause briefly at the start and end of the motion. Those micro-pauses are gold in editing.
When to use a gimbal (and when not to)
A gimbal shines when you need controlled, repeatable movement: walkthroughs, “follow me” shots, and smooth product reveals. But it’s not automatically the best choice.
- Use a gimbal if movement is the point of the shot and you’ll repeat it often.
- Skip the gimbal for quick daily posting where setup time kills momentum; enhanced stabilization plus good walking technique is often enough.
Also note that gimbals can drift or fight intentional framing if not calibrated. Always record a 3–5 second test clip and review it at full size before filming the real take.
Post stabilization: how to “fix it in editing” without ruining quality
Editing stabilization is best used as a light polish, not a rescue mission. Over-stabilizing can cause “rubber edges,” wobbling backgrounds, or excessive cropping.
Practical post-stabilization tips
- Stabilize first, then crop/reframe, then add text/subtitles (so text doesn’t drift).
- Apply stabilization to the smallest necessary clips, not your entire timeline.
- If the background has repeating patterns (blinds, tiles, shelves), use lower stabilization strength to avoid warping.
If your footage needs extreme stabilization to look “okay,” it’s usually faster to reshoot with a tripod, a wider lens, or slower movement.
A repeatable creator workflow for stable scripted videos
This checklist is designed for creators who record a scripted A-roll (often with a teleprompter) plus a few b-roll inserts.
Step 1: Plan shots to minimize shaky moments
Create a simple shot list. Here’s a lightweight template you can copy into Notes:
SHOT LIST
1) A-roll (tripod): Intro + key points (2–4 min)
2) B-roll (handheld): Close-up of product (10–15 sec)
3) B-roll (static): Screen/desk demo (10–20 sec)
4) A-roll (tripod): CTA + outro (20–40 sec)

Stability notes:
- Handheld moves: slow push-in only
- Pause 1 sec before/after each move
Step 2: Lock your A-roll setup
- Tripod height: eye level
- Camera: wide/main lens where possible
- Framing: leave safe margins for cropping
- Focus/exposure: locked
Step 3: Record A-roll in clean segments
Instead of trying to nail a perfect 6-minute take, record in sections (intro, point 1, point 2, outro). That reduces fatigue, keeps delivery fresh, and avoids the temptation to “fix” problems by handheld filming.
Step 4: Capture b-roll with stability constraints
- Use 60fps if you expect motion or want optional slow motion.
- Keep moves single-axis (push-in OR pan; not both).
- Record each b-roll clip 3–5 seconds longer than needed for easier trimming.
Step 5: Edit with stability in mind
- Stabilize shaky b-roll lightly, then trim.
- Match b-roll to your spoken line (don’t leave b-roll lingering).
- Add subtitles after stabilization and reframing so captions remain steady.
Common stabilization problems (and quick fixes)
Your video looks “floaty” or warped
- Reduce post-stabilization strength.
- Avoid fast pans; reshoot with slower movement.
- Use a wider lens to reduce perceived shake.
Your walking shots still bounce
- Switch to an enhanced stabilization mode for movement.
- Shorten steps and keep elbows tucked.
- Consider a small gimbal for frequent moving shots.
Your static tripod shot still shakes
- Check for a wobbly tripod head or flexible mount.
- Stop touching the phone during recording (use a remote or timer if needed).
- Stabilize your surface (desk vibrations are real).
How stabilization supports better subtitles and retention
Stability isn’t only about “cinematic” polish. It improves clarity for viewers:
- Subtitles stay readable because the frame doesn’t jump around behind the text.
- On-screen demos are easier to follow when motion is deliberate.
- Jump cuts feel intentional because your framing remains consistent across takes.
If your workflow includes on-device subtitle generation, stable framing also reduces visual noise—especially in vertical formats where text takes up more of the screen.
Putting it all together
The simplest path to consistently smooth results is:
- Record scripted A-roll on a tripod (wide lens, locked exposure/focus).
- Capture b-roll with slow, intentional movement (or enhanced stabilization for walking).
- Use post stabilization only as a light polish.
- Design your shots with small crops in mind for vertical exports.
Once you build this into your routine, stabilized video recording becomes less of a technical hurdle and more of a creative choice—helping your delivery, your edits, and your subtitles feel cleaner.
Note: If you prefer recording scripted videos while maintaining eye contact, using a teleprompter-style iPhone workflow can help keep your framing consistent; apps like CueCam combine script reading with recording and creator-focused editing tools.
