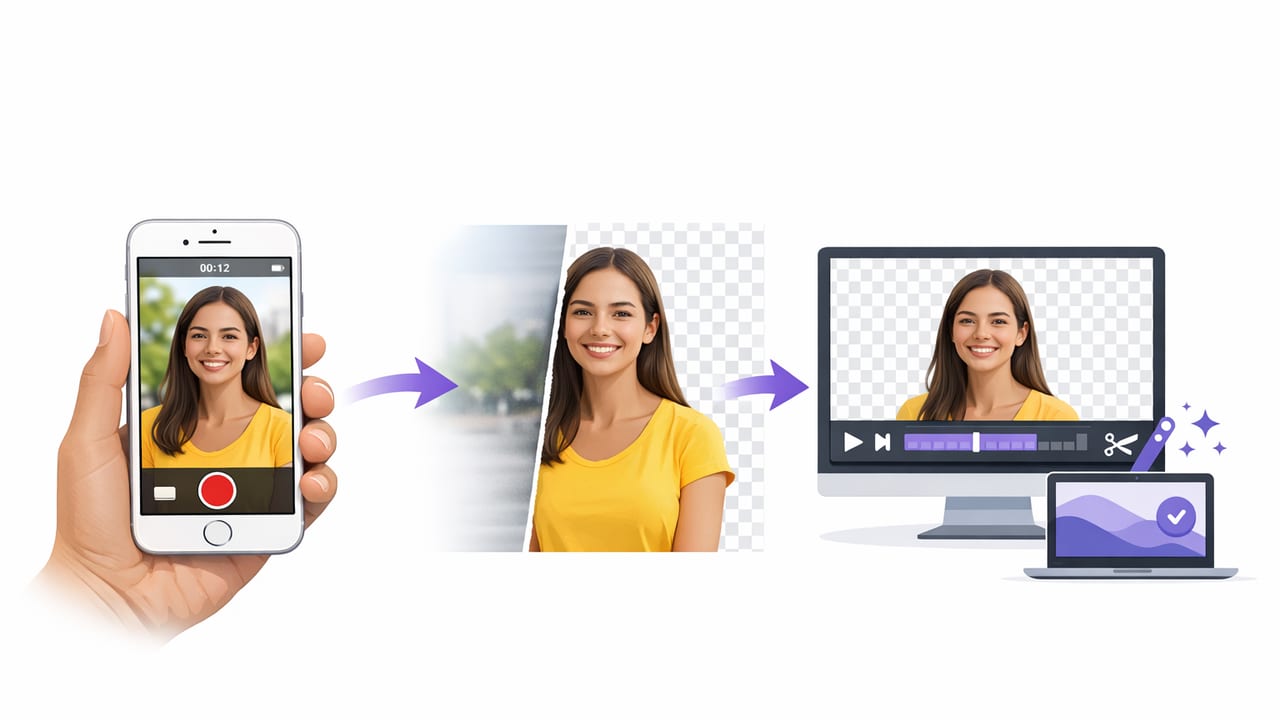
If you want to remove background in iPhone videos, the goal isn’t just “delete the backdrop”—it’s getting a clean subject cutout, natural edges (especially around hair), and believable lighting so the final video doesn’t scream “edited.” The good news: you can do it on an iPhone with a few reliable approaches, and which one you choose depends on your setup, your footage, and how polished you need the result to be.
This guide breaks down three practical methods to remove or replace a video background on iPhone, plus a troubleshooting section for the issues that most often ruin results.
Quick comparison: which iPhone background removal method is best?
| Method | Best for | Quality | Effort | Common pitfalls |
|---|---|---|---|---|
| Green screen (chroma key) | Creator setups, courses, talking-head content | Highest (when lit well) | Medium | Wrinkles/shadows cause spill and holes |
| AI background removal | Fast social content, travel clips, product demos | Good to very good | Low | Hair/fast motion can look “cut out” |
| Portrait-style depth separation | Soft background blur (not full removal) | Natural (when available) | Low | Not a true transparent cutout |
Before you start: what “clean background removal” actually requires
No matter which tool you use, background removal quality is mostly determined before you tap “export.” Here are the variables that matter most:
- Separation: You need distance between you and the background (even 3–6 feet helps). This reduces shadows and makes edges easier to detect.
- Lighting consistency: Flicker or mixed color temperatures (window light + warm lamp) can cause edge chatter and color spill.
- Motion control: Fast hand waves, whipping hair, or motion blur creates smeary edges in AI masks.
- Wardrobe choices: Avoid colors that match your backdrop (especially green with green screen). Avoid sheer fabrics that confuse segmentation.
- Resolution and sharpness: Record the cleanest footage you can. Higher detail makes better masks and cleaner outlines.
Rule of thumb: if your camera struggles to focus or expose correctly, your background removal tool will struggle too.
Method 1: Green screen (best quality for true background replacement)
Green screen is still the most reliable way to remove background in iPhone videos when you need a crisp cutout—especially for scripted talking-head videos, tutorials, or presenter overlays.
Setup checklist (you’ll feel the difference)
- Backdrop: a wrinkle-free green fabric or collapsible green screen.
- Distance: stand 4–8 feet from the screen to reduce shadows and green spill.
- Lighting: light the screen separately from your face if possible. The screen should look evenly lit with no hot spots.
- Hair light (optional): a small light behind you helps separate edges.
Step-by-step workflow (generic app steps)
- Record your clip with stable framing. Lock exposure if your camera app supports it to avoid brightness shifts.
- Open a video editor that supports chroma key (often labeled “Green Screen,” “Chroma Key,” or “Keying”).
- Add your background layer (image or video) on the timeline first.
- Place your green-screen clip above it as an overlay.
- Enable chroma key and sample the green. Adjust:
- Threshold/Strength to remove the green without cutting into your skin or clothing
- Feather to soften edges slightly
- Spill suppression to remove green tint on skin and hair
- Match the background: add a tiny shadow, slightly blur the background, or reduce its saturation so it doesn’t look pasted-in.
- Export at the highest quality you can (then compress only if the platform requires it).
Green screen tips that prevent “holes” and jagged hair
- Don’t over-key: If you crank the threshold too far, parts of your face, hands, or clothes may disappear.
- Watch the edges in motion: A key that looks fine on a paused frame may shimmer during movement.
- Avoid shiny skin: Shine reflects green and can turn into semi-transparent patches. A little matte powder helps.
Method 2: AI background removal (fastest for everyday creator videos)
AI segmentation is the quickest way to remove video background on iPhone when you don’t have a green screen (or you’re editing travel footage, B-roll, or short-form content). Instead of keying out a specific color, the app identifies the person/object and generates a moving mask.
When AI works best
- Simple scenes with a clear subject and moderate contrast
- Minimal motion blur (steady camera, good light)
- Clothing edges that are distinct from the background
Step-by-step workflow (AI cutout)
- Choose an AI background removal tool that supports video (not just photo cutouts).
- Import your clip and select “Remove Background” or “Cutout.”
- Pick a replacement: solid color, gradient, image, or video background.
- Refine the mask if the tool supports it:
- Edge smoothing/feather for less jagged outlines
- Decontaminate/defringe to reduce haloing
- Motion refinement (if available) to reduce mask jitter
- Color match: lightly adjust warmth/tint so subject and background feel like the same scene.
- Export and review on a bigger screen if possible. Look for flicker around hair, fingers, shoulders, and fast turns.
Fixing the most common AI issues
- Mask jitter (edge “buzzing”): Reduce sharpening, add slight feather, and use a calmer background (busy textures make jitter more obvious).
- Hair looks crunchy: Use a background with less contrast, add a subtle blur behind you, or reduce the replacement background’s clarity.
- Transparent hands: This often comes from motion blur. Re-record with more light (faster shutter) or slower gestures.
Method 3: Portrait-style separation (natural look, but not true removal)
Sometimes you don’t need a full cutout—just a cleaner, less distracting backdrop. If your camera/editor supports depth-based background blur (portrait-like video effects), it can deliver a realistic separation that feels more “camera-native” than a hard cutout.
Best use cases
- Talking-head videos where you want the viewer focused on your face
- Messy rooms you can’t fully hide
- Quick edits where realism matters more than a new background scene
Limitations to know
- Not a transparent background: you’re blurring, not removing.
- Edge artifacts still happen, especially with glasses, microphones near the face, or hair.
- Depth errors are more obvious when the background has sharp lines (shelves, door frames).
Export settings that keep your edges clean
Background removal lives and dies by compression. Social platforms love to destroy fine details like hair and soft edges.
- Prefer 1080p or higher for uploads when possible; tiny masks fall apart at low resolution.
- Use a higher bitrate if your editor offers it (especially for moving backgrounds).
- Watch for banding on gradients or solid-color backgrounds; a little noise/grain can hide banding.
- Consider a slightly blurred replacement background to reduce compression artifacts around edges.
Troubleshooting: why your background removal looks bad (and how to fix it)
Problem: Green spill (your skin/hair looks tinted)
- Fix: Increase distance from screen, add spill suppression, and avoid reflective makeup or shiny fabric.
- Fix: Light the screen more evenly and reduce hotspots.
Problem: The subject has a “halo” outline
- Fix: Use defringe/decontaminate if available; slightly feather edges; darken the replacement background a touch.
- Fix: Reduce in-app sharpening and clarity before masking.
Problem: Parts of the body disappear (holes in the mask)
- Fix (green screen): Lower key strength/threshold; make sure clothing doesn’t match the screen color.
- Fix (AI): Improve lighting and contrast; avoid fast motion blur; choose a simpler background behind you when filming.
Problem: Edges shimmer during movement
- Fix: Add slight motion blur in the editor (if available) or reduce edge sharpness; stabilize the clip.
- Fix: Re-record at a higher frame rate if your workflow supports it, then export carefully.
Optional: an advanced “clean key” checklist for repeatable results
If you’re doing this often (courses, weekly content, client work), this repeatable checklist helps you get consistent background removal on iPhone:
- Lock camera settings (exposure and focus) to prevent flicker and pumping.
- Use a plain background while filming (even for AI tools). Busy shelves and patterned wallpaper reduce accuracy.
- Record clean audio separately if possible—then you can re-record video without worrying about sound.
- Do a 10-second test clip and run the background removal before recording your whole script.
- Keep your replacement background consistent across episodes (same lighting direction, similar blur, similar color temperature).
For creators who also script: keep your eye line steady
Background removal is only half the “pro” look. The other half is delivery—steady framing, calm movement, and consistent eye contact. If you’re reading lines, consider recording with a teleprompter-style workflow so your gaze stays near the lens while you keep takes tight and consistent.
A tiny technical note (for editors who leave the phone)
If you ever move to desktop tools, you’ll see chroma key and matte refinement controls that mirror iPhone editors. For example, a simple chroma key pipeline might be represented like this:
# Conceptual example (desktop): key green, then refine edges
ffmpeg -i input.mp4 -vf "chromakey=0x00FF00:0.25:0.08" -c:a copy keyed.mp4
You don’t need this to succeed on iPhone—but it helps to understand why lighting and even color matter so much.
Bottom line
To remove background in iPhone videos with professional-looking results:
- Choose green screen for the cleanest, most controllable cutout.
- Choose AI background removal for speed and convenience (and optimize your filming conditions).
- Choose portrait-style blur when you want a natural upgrade without a full replacement.
If you’re building a repeatable script-to-video workflow on iPhone, a tool like CueCam can combine teleprompter-style reading with on-device creation features—helpful when you want polished takes while keeping your content private on your phone.
