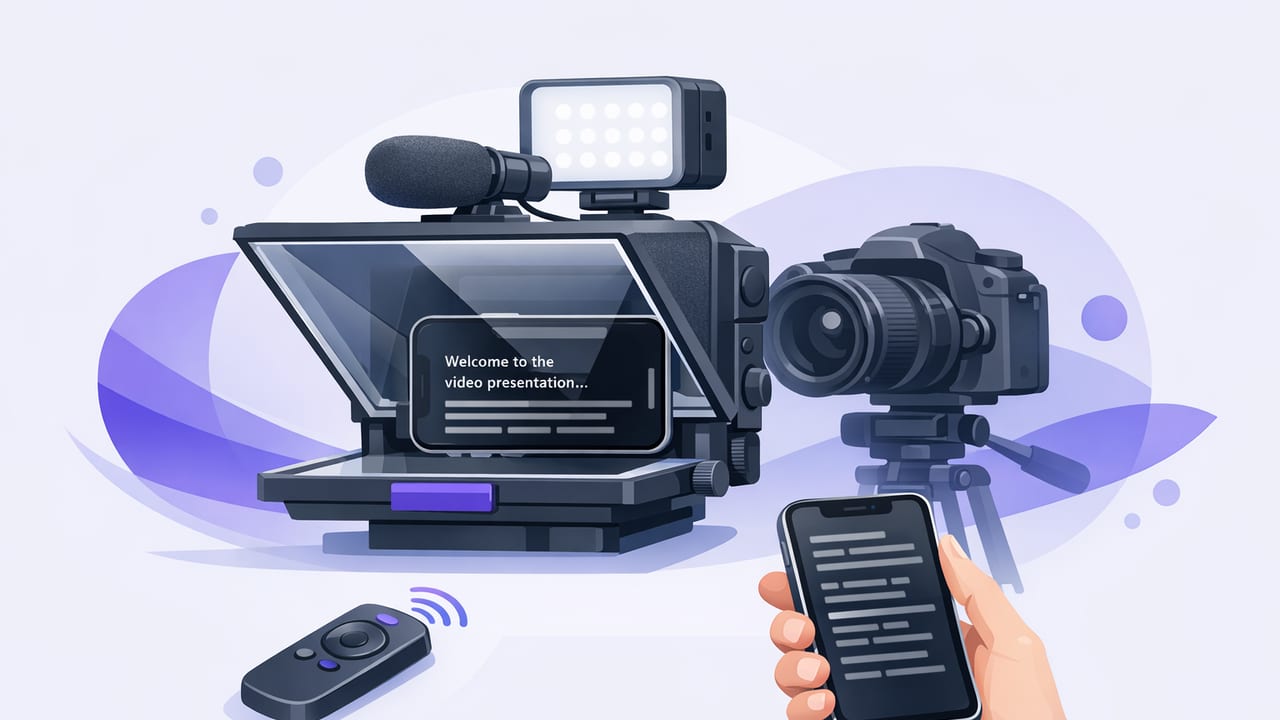
An iPhone teleprompter can turn “I know what to say, but I can’t say it on camera” into smooth, confident delivery—without memorizing lines or staring off-screen at notes. The trick isn’t just pressing record; it’s choosing the right prompting mode, formatting scripts for spoken rhythm, placing the phone correctly for real eye contact, and building a repeatable workflow that ends with clean exports (and subtitles) for social platforms.
This guide breaks down an end-to-end setup that works for talking-head videos, tutorials, product explainers, courses, and short-form clips—while keeping your process fast and your on-camera presence natural.
Why an iPhone teleprompter improves on-camera delivery
Reading from a script often looks “read” because the viewer can detect two things: eye drift (you’re looking away from the lens) and monotone pacing (you’re trying to keep up with the text). An iPhone teleprompter solves both—if you set it up correctly.
- Eye contact: Prompting text sits close to the camera lens, so your gaze stays centered.
- Consistency: A script keeps your message tight, reducing rambling and retakes.
- Speed: You can record faster than doing multiple takes from bullet points.
- Accessibility: Scripts help with complex terminology, names, and numbers.
Rule of thumb: The closer the text is to the lens, the more “present” you look—even if you’re reading every word.
Choose the right teleprompter scrolling mode (and when to use it)
Most iPhone teleprompter experiences boil down to three scrolling styles. Picking the right one is the difference between sounding conversational and sounding like you’re chasing the script.
| Mode | Best for | Pros | Watch out for |
|---|---|---|---|
| Voice-following | Natural delivery, variable pace, one-take recordings | Adapts to pauses; you can emphasize lines without losing your place | Needs clear audio input; loud environments may reduce accuracy |
| Fixed-speed | Short scripts with predictable pacing (ads, hooks) | Simple; consistent cadence across takes | If you stumble, you’ll feel rushed |
| Timed | Matching a strict duration (30s/60s), slide narration | Helps you hit exact runtimes | Less forgiving if you ad-lib or add emphasis |
If you’re new, start with voice-following for long-form talking head, and use timed only when you must hit a strict length.
Physical setup: camera position, eye line, and distance
Your setup determines whether your iPhone teleprompter looks like a professional read or a distracted glance. Use these practical defaults:
1) Put the lens at eye level (or slightly above)
Place the phone so the camera lens is aligned with your eyes. A slightly higher lens is usually flattering and reduces double-chin angles. If you’re using a tripod, raise it until you feel like you’re speaking to a person standing across from you.
2) Keep the script close to the lens
Many creators make the mistake of putting the script below the camera preview. That produces a downward gaze that reads as uncertainty. Center the scrolling text near the lens area whenever possible.
3) Use a consistent framing distance
For talking-head video, a good baseline is a medium close-up: mid-chest to a bit above the head. This keeps facial expression visible while leaving room for captions.
4) Light and audio matter more than you think
A teleprompter can’t fix noisy audio or harsh lighting. If you can, use:
- Soft front light (window light or a small key light)
- An external mic (wired lav or wireless) to improve voice-follow accuracy and clarity
- Stabilization if handholding, or a tripod for consistent takes
Script formatting that sounds human (not “teleprompter voice”)
Great teleprompter delivery is mostly a writing problem. You’re not writing an essay—you’re writing spoken language. Here’s a format that helps you breathe, pause, and emphasize without losing your place.
Use short lines and intentional pauses
Break long sentences into line breaks where you’d naturally pause. Add visual cues for emphasis.
[HOOK]
If your videos feel awkward...

it’s usually not your camera.

It’s your eye line.

[POINT]
Put the script near the lens.
Pause after key lines.
And keep sentences short.

[CTA]
If you want, I’ll share my exact setup next.
Write for speech: 3 practical rules
- One idea per sentence. If you need commas, you probably need line breaks.
- Use contractions. “You’re” reads more natural than “you are.”
- Mark emphasis sparingly. Use italics or ALL CAPS only for 1–2 key words per paragraph.
Add “performance notes” that viewers never hear
These cues keep your face expressive and your tone varied:
- (smile) before friendly lines
- (pause) after important claims
- (slower) when explaining steps
- (beat) before a punchline or hook
Dial in speed, font, and margins for effortless reading
Even with a great script, poor teleprompter settings create strain. Use these starting points and adjust after one test recording.
- Font size: Large enough to read without squinting (squinting looks like skepticism on camera).
- Line spacing: Slightly increased spacing improves tracking and reduces skipped lines.
- Margins: Keep text in the center column so your eyes don’t scan wide.
- Speed: Slower than you think. Most people rush when they see moving text.
Do one 10–15 second test: if you can’t comfortably add a pause without losing your place, the speed is too fast (or voice-follow sensitivity needs adjusting).
Recording workflow: from teleprompter to 4K video without friction
A clean workflow reduces retakes. Here’s a reliable sequence for scripted iPhone recording, especially if you want high-quality output such as 4K.
- Finalize the script (read it out loud once). Fix tongue-twisters.
- Lock your framing (tripod, level horizon, eye-level lens).
- Set video settings (resolution/frame rate) based on platform needs.
- Confirm audio input (external mic selected, levels clean).
- Run a 10-second test (check eye line, brightness, background distractions).
- Record in sections if needed (hook, body, CTA). You can stitch later.
Which resolution and frame rate should you pick?
For most creator workflows:
- 4K/30fps: Great default for talking head; flexible for cropping.
- 4K/60fps: Useful if you move a lot or want smoother motion (and don’t mind larger files).
- 1080p/30fps: Fine for fast turnaround and smaller exports.
Subtitles: the fastest way to boost retention (and how to keep them accurate)
Subtitles aren’t just for accessibility; they’re a retention tool. Many viewers watch on mute, and captions help them follow your point quickly.
Tips for accurate subtitles
- Speak punctuation. Natural pauses create better caption segmentation.
- Avoid talking over yourself. If you restart a sentence, pause and start clean.
- Use clear names and terms. If you must say a brand or technical word, slow down slightly.
- Record clean audio. Better audio equals better transcription.
On-device subtitles and privacy
If privacy matters (client work, internal scripts, unreleased product notes), consider tools that generate subtitles on-device. That way, your scripts and recordings don’t need to be uploaded to a server just to get captions.
Common iPhone teleprompter mistakes (and quick fixes)
- Mistake: You look “glassy-eyed.”
Fix: Add more pauses and vary emphasis; reduce scroll speed. - Mistake: Your eyes bounce left-to-right.
Fix: Narrow the text column with bigger margins; increase font size. - Mistake: You sound rushed.
Fix: Insert line breaks; aim for shorter sentences; slow the prompt. - Mistake: You lose your place after a pause.
Fix: Try voice-following mode, or add section headers like [HOOK], [POINT]. - Mistake: Captions are wrong.
Fix: Improve mic quality and reduce background noise; speak slightly slower on names.
A repeatable checklist for every shoot
Use this quick pre-flight list to make your iPhone teleprompter recordings consistent:
- Script: Short lines, spoken phrasing, emphasis cues
- Lens position: Eye level, stable tripod
- Text placement: Near lens, centered column
- Settings: Correct resolution/frame rate; enough storage
- Audio: External mic connected; test playback
- Light: Soft front light; avoid backlit windows
- Test: 10 seconds to confirm eye line + sound + background
Putting it all together: a simple script-to-video workflow
If you want the smoothest results, build a “single lane” workflow: write → prompt → record → subtitle → export. Keeping everything on one device reduces friction and helps you publish more consistently.
Some creators use an iPhone teleprompter and recorder that includes voice-following, pro camera options (including 4K), built-in edits, and on-device subtitles for privacy—for example, CueCam is one option that combines these steps without requiring an account.
Next step: Pick one script you’ve already tried to film, reformat it with shorter lines and pauses, and record a single 30–45 second take. Most people see an immediate improvement in eye contact and confidence on the first attempt.
