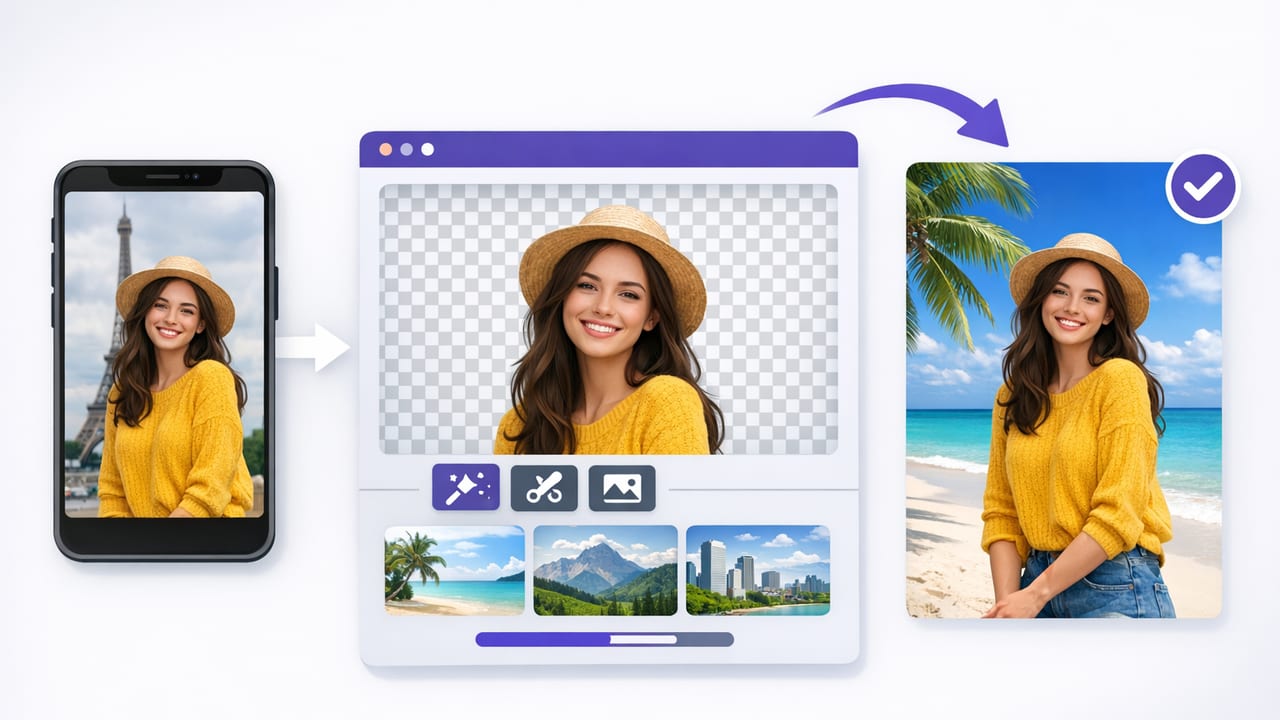
A background replacement app can turn a spare bedroom, busy office, or messy kitchen into a clean, consistent “set” in minutes. For creators filming tutorials, talking-head content, product explainers, or UGC-style ads, background replacement helps you keep attention on the message—without renting a studio or rebuilding your space every time you record.
This guide explains how background replacement works, how to get more realistic results on iPhone, and a practical workflow you can repeat for fast, polished videos.
What a background replacement app actually does
Most modern background replacement tools use subject segmentation: the app identifies you (foreground) and separates you from what’s behind you (background). Then it can:
- Replace the background with an image, video, gradient, or branded scene
- Blur the background (portrait-style depth effect)
- Remove the background entirely (transparent export in some workflows)
Some apps also support classic green screen (chroma key), which can look extremely clean if lit well. AI segmentation is faster and more flexible, while green screen is often more precise when done correctly.
When background replacement is worth using (and when it isn’t)
Great use cases
- Consistent branding: reuse the same “set” across weeks of content
- Busy locations: filming in an office, café, hotel, or trade show
- Small spaces: you can’t back up far enough to hide clutter
- Product videos: clean background for clearer focus on the item
- Multi-platform content: adapt background to vertical, square, and horizontal crops
When to avoid it
- High-motion footage: hair, hands, fast gestures, and motion blur can cause edge artifacts
- Low light: noise reduces segmentation quality
- Highly reflective clothing/accessories: glasses, shiny jewelry, or sequins can confuse edges
Rule of thumb: If your camera struggles to expose you cleanly, your background replacement app will struggle to separate you cleanly.
What to look for in a background replacement app (creator checklist)
Not all tools are built for creator workflows. If you record often, prioritize features that reduce retakes and re-editing.
- Edge quality controls: feathering, spill suppression, refinement, “halo” reduction
- Background options: stills, video loops, gradients, custom uploads
- Lighting matching: exposure/temperature tweaks so you don’t look “pasted on”
- Shadow support: a subtle ground shadow can make replacements look real
- Export presets: optimized sizes for TikTok, Instagram Reels, YouTube Shorts, and YouTube
- Audio handling: keeps clean voice audio without weird processing artifacts
- On-device processing and privacy: helpful if you film client work or sensitive scripts
Step-by-step workflow: clean background replacement on iPhone
1) Set up for separation (before you open any app)
Good background replacement starts in the real world. Your goal is to make you distinct from the background.
- Add light to your face: a window, softbox, or ring light slightly above eye level.
- Create distance: stand 4–8 feet from the wall behind you if possible. More distance = cleaner edges.
- Avoid “busy” backdrops: patterned curtains, plants, and shelves can confuse segmentation.
- Lock focus/exposure: on iPhone, press-and-hold to lock (varies by camera app). Consistent exposure reduces flicker.
2) Choose wardrobe that won’t break the mask
Wardrobe is a surprisingly common failure point for a background replacement app.
- Prefer solid colors with clear contrast from the background.
- Avoid thin straps, frizzy hair against similar-color walls, and very fine patterns.
- Watch for green clothing if you use chroma key.
3) Record with quality in mind (resolution, frame rate, motion)
Higher detail helps segmentation. If your workflow allows it, record at higher resolutions (for example, 4K) and keep motion controlled:
- Stabilize the shot: tripod or stable surface.
- Reduce motion blur: avoid fast hand waves close to the camera.
- Keep framing consistent: sudden reframes can change exposure and edge behavior.
4) Apply background replacement and refine edges
Once you import or process your clip in a background replacement app, spend a minute on refinement. This is where “good enough” becomes “professional.”
- Feather edges slightly: too sharp looks cut-out; too soft looks blurry.
- Decontaminate color spill: especially important with green screen.
- Check hair and hands: scrub through your clip around gestures and head movement.
5) Match the background to your lighting
The most common giveaway is mismatched lighting direction and color temperature. If your face is warm but your background is cool (or vice versa), the composite looks fake.
- Match brightness: don’t place yourself in a “bright office” background if you’re lit dimly.
- Match direction: if your key light is camera-left, avoid a background that implies strong light from camera-right.
- Add a subtle shadow: a faint drop shadow behind you can improve realism.
6) Export for each platform (without wrecking quality)
Export settings affect edge quality. Over-compression can create shimmering around hair and shoulders.
| Platform | Aspect Ratio | Suggested Export Notes |
|---|---|---|
| TikTok / Reels / Shorts | 9:16 | Export at 1080×1920 (or higher if supported). Avoid heavy compression; check edges on playback. |
| Instagram Feed (video) | 4:5 or 1:1 | Reframe so your head isn’t cropped. Consider simpler backgrounds that survive compression. |
| YouTube (standard) | 16:9 | Export at 1080p or 4K. Higher bitrate preserves hair detail and reduces edge ringing. |
Troubleshooting: fix the 7 most common background replacement problems
1) “Halo” outline around shoulders or hair
- Reduce edge sharpening or increase feather slightly.
- Try a background with less contrast at the edge (mid-tones instead of pure white/black).
2) Hair looks choppy or disappears
- Add more front light and reduce backlight flare.
- Avoid backgrounds with fine detail (leaves, bokeh, patterns) right behind hair.
3) Hands flicker when gesturing
- Slow gestures slightly and keep hands closer to your torso.
- Increase shutter speed if your camera controls allow it (less motion blur = cleaner mask).
4) Background “bleeds” through glasses or transparent objects
- Switch to a simpler replacement background.
- Angle lights to reduce reflections in lenses.
5) Edges crawl after export
- Export at a higher bitrate/quality setting.
- Avoid re-uploading and re-downloading the same file multiple times before posting.
6) Green screen looks uneven
- Light the screen separately from your face.
- Increase distance from the screen to reduce green spill on skin.
7) The replacement looks “fake” even with clean edges
- Match camera perspective: don’t use a background shot from a very different angle.
- Add a subtle blur to the background to mimic depth of field.
- Use backgrounds that make sense for your content (simple office, studio wall, soft gradient).
Fast workflow template (copy/paste)
If you film frequently, consistency beats perfection. Use a repeatable checklist so every video starts from a known-good setup.
BACKGROUND REPLACEMENT SHOOT CHECKLIST

1) Light: key light on face, consistent brightness
2) Distance: 4–8 ft from background
3) Camera: tripod, lock exposure, 4K if available
4) Wardrobe: solid color, no fine patterns
5) Take: slow gestures, avoid fast motion blur
6) Replace: choose background, refine edges, remove spill
7) Match: brightness + color temperature + subtle shadow
8) Export: platform aspect ratio + high quality
Privacy and on-device processing: why it matters for creators
Background replacement often involves analyzing every frame of your video. If you’re filming client work, internal company content, or personal stories, consider whether processing happens on-device or in the cloud. On-device workflows can reduce upload time, keep raw clips private, and simplify approvals—especially when scripts, faces, or locations are sensitive.
Putting it all together
A background replacement app is at its best when it supports your entire recording workflow: clean capture, reliable subject separation, quick refinements, and exports that hold up after social platform compression. Focus first on lighting and distance, then refine edges and match the background to your scene. With a repeatable setup, you’ll spend less time fixing problems and more time publishing.
If your content is script-driven, pairing background replacement with a teleprompter-style recording workflow can further reduce retakes; for example, apps like CueCam combine scripted recording features with creator-friendly tools so you can stay efficient from take to export.
